
Decorating your home should be a reflection of your personal style, but if you live in a rental or apartment, making changes to the walls can be tricky. Many landlords prohibit nails or screws, making it difficult to display framed artwork, canvas prints, or decorative mirrors without risking damage—or losing your security deposit.
Fortunately, there are plenty of damage-free hanging solutions that allow you to display your wall art securely while keeping your walls pristine. Whether you have lightweight prints or heavier framed pieces, the methods below will ensure your decor stays stylish and well-placed—without a single nail.
1. Use Removable Adhesive Strips for Lightweight to Medium Artwork
Removable adhesive strips are one of the most effective and widely available solutions for hanging framed prints, canvas art, and decorative accents. These strips create a strong bond with the wall while remaining fully removable when it’s time to take your artwork down.
How to Use Adhesive Strips:
- 1Select the Right Type: Adhesive strips come in different weight ratings, so be sure to choose strips that can hold the weight of your frame. For small to medium frames (up to 16 pounds), look for heavy-duty adhesive strips specifically designed for picture hanging.
- Prepare the Wall Surface: Wipe the wall with rubbing alcohol (not water or household cleaners) to remove any dust or oils. A clean surface ensures the strips stick properly.
- Attach the Strips to the Frame: Depending on the product instructions, apply one side of the adhesive strip to the back of your frame and the other to the wall. Some strips require pressing both sides together before mounting.
- Position and Secure the Artwork: Carefully align your frame where you want it, then press it firmly against the wall for at least 30 seconds to ensure a strong bond.
- Allow the Adhesive to Set (If Required): Some adhesive brands recommend waiting an hour or more before hanging heavy pieces to let the adhesive fully bond.
Pro Tip: For the best hold, use multiple strips evenly spaced along the back of the frame, rather than relying on just one or two. For wide frames, place strips on all four corners and along the top and bottom edges for added security.
2. Try Hook-and-Loop (Velcro) Strips for Easy Adjustments
If you like to switch out your artwork regularly, hook-and-loop strips (such as Velcro-style strips) offer a practical, reusable solution. These strips allow you to remove and reposition frames without losing adhesive strength, making them perfect for a gallery wall or seasonal artwork changes.
How to Use Hook-and-Loop Strips:
- Choose the Correct Strength: Not all hook-and-loop strips are designed for wall mounting. Look for a brand that offers strong adhesive backing and weight-rated options.
- Apply to the Frame and Wall: Attach one side of the strip to the back of your frame and the matching side to the wall, pressing firmly to create a secure bond.
- Mount and Adjust: Once the strips are in place, press your artwork against the wall. If you need to adjust later, simply pull the frame off, reposition it, and press it back into place.
Pro Tip:
Hook-and-loop strips are perfect for renters who frequently rearrange their artwork. However, they work best on smooth walls—avoid using them on heavily textured surfaces, as they may not adhere as well.
3. Use Heavy-Duty Adhesive Hooks for Large or Heavy Artwork
If you need to hang heavier framed pieces, such as oversized prints, mirrors, or art with thick wooden frames, standard adhesive strips might not be enough. Instead, heavy-duty adhesive hooks provide a stronger, more reliable solution while still being completely removable. These hooks are designed to support substantial weight—be sure to check the hook packaging for weight limits.
How to Use Adhesive Hooks:
- Choose Hooks with the Right Weight Capacity: Check the packaging to ensure the hooks can support your artwork’s weight. It’s always better to overestimate to prevent accidents.
- Clean the Wall Thoroughly: Just like with adhesive strips, use rubbing alcohol to remove dust and oils for the best adhesion.
- Attach the Hook and Let It Set: Remove the adhesive backing and press the hook firmly against the wall. Some brands require 24 hours of curing time before placing weight on the hook—follow the instructions carefully.
- Hang Your Artwork Securely: Once the hook is fully set, place the frame’s built-in hanging wire or D-rings onto the hook for secure placement.
Pro Tip: For heavier pieces, use two adhesive hooks instead of one to distribute the weight evenly. This prevents stress on a single point, reducing the risk of failure.
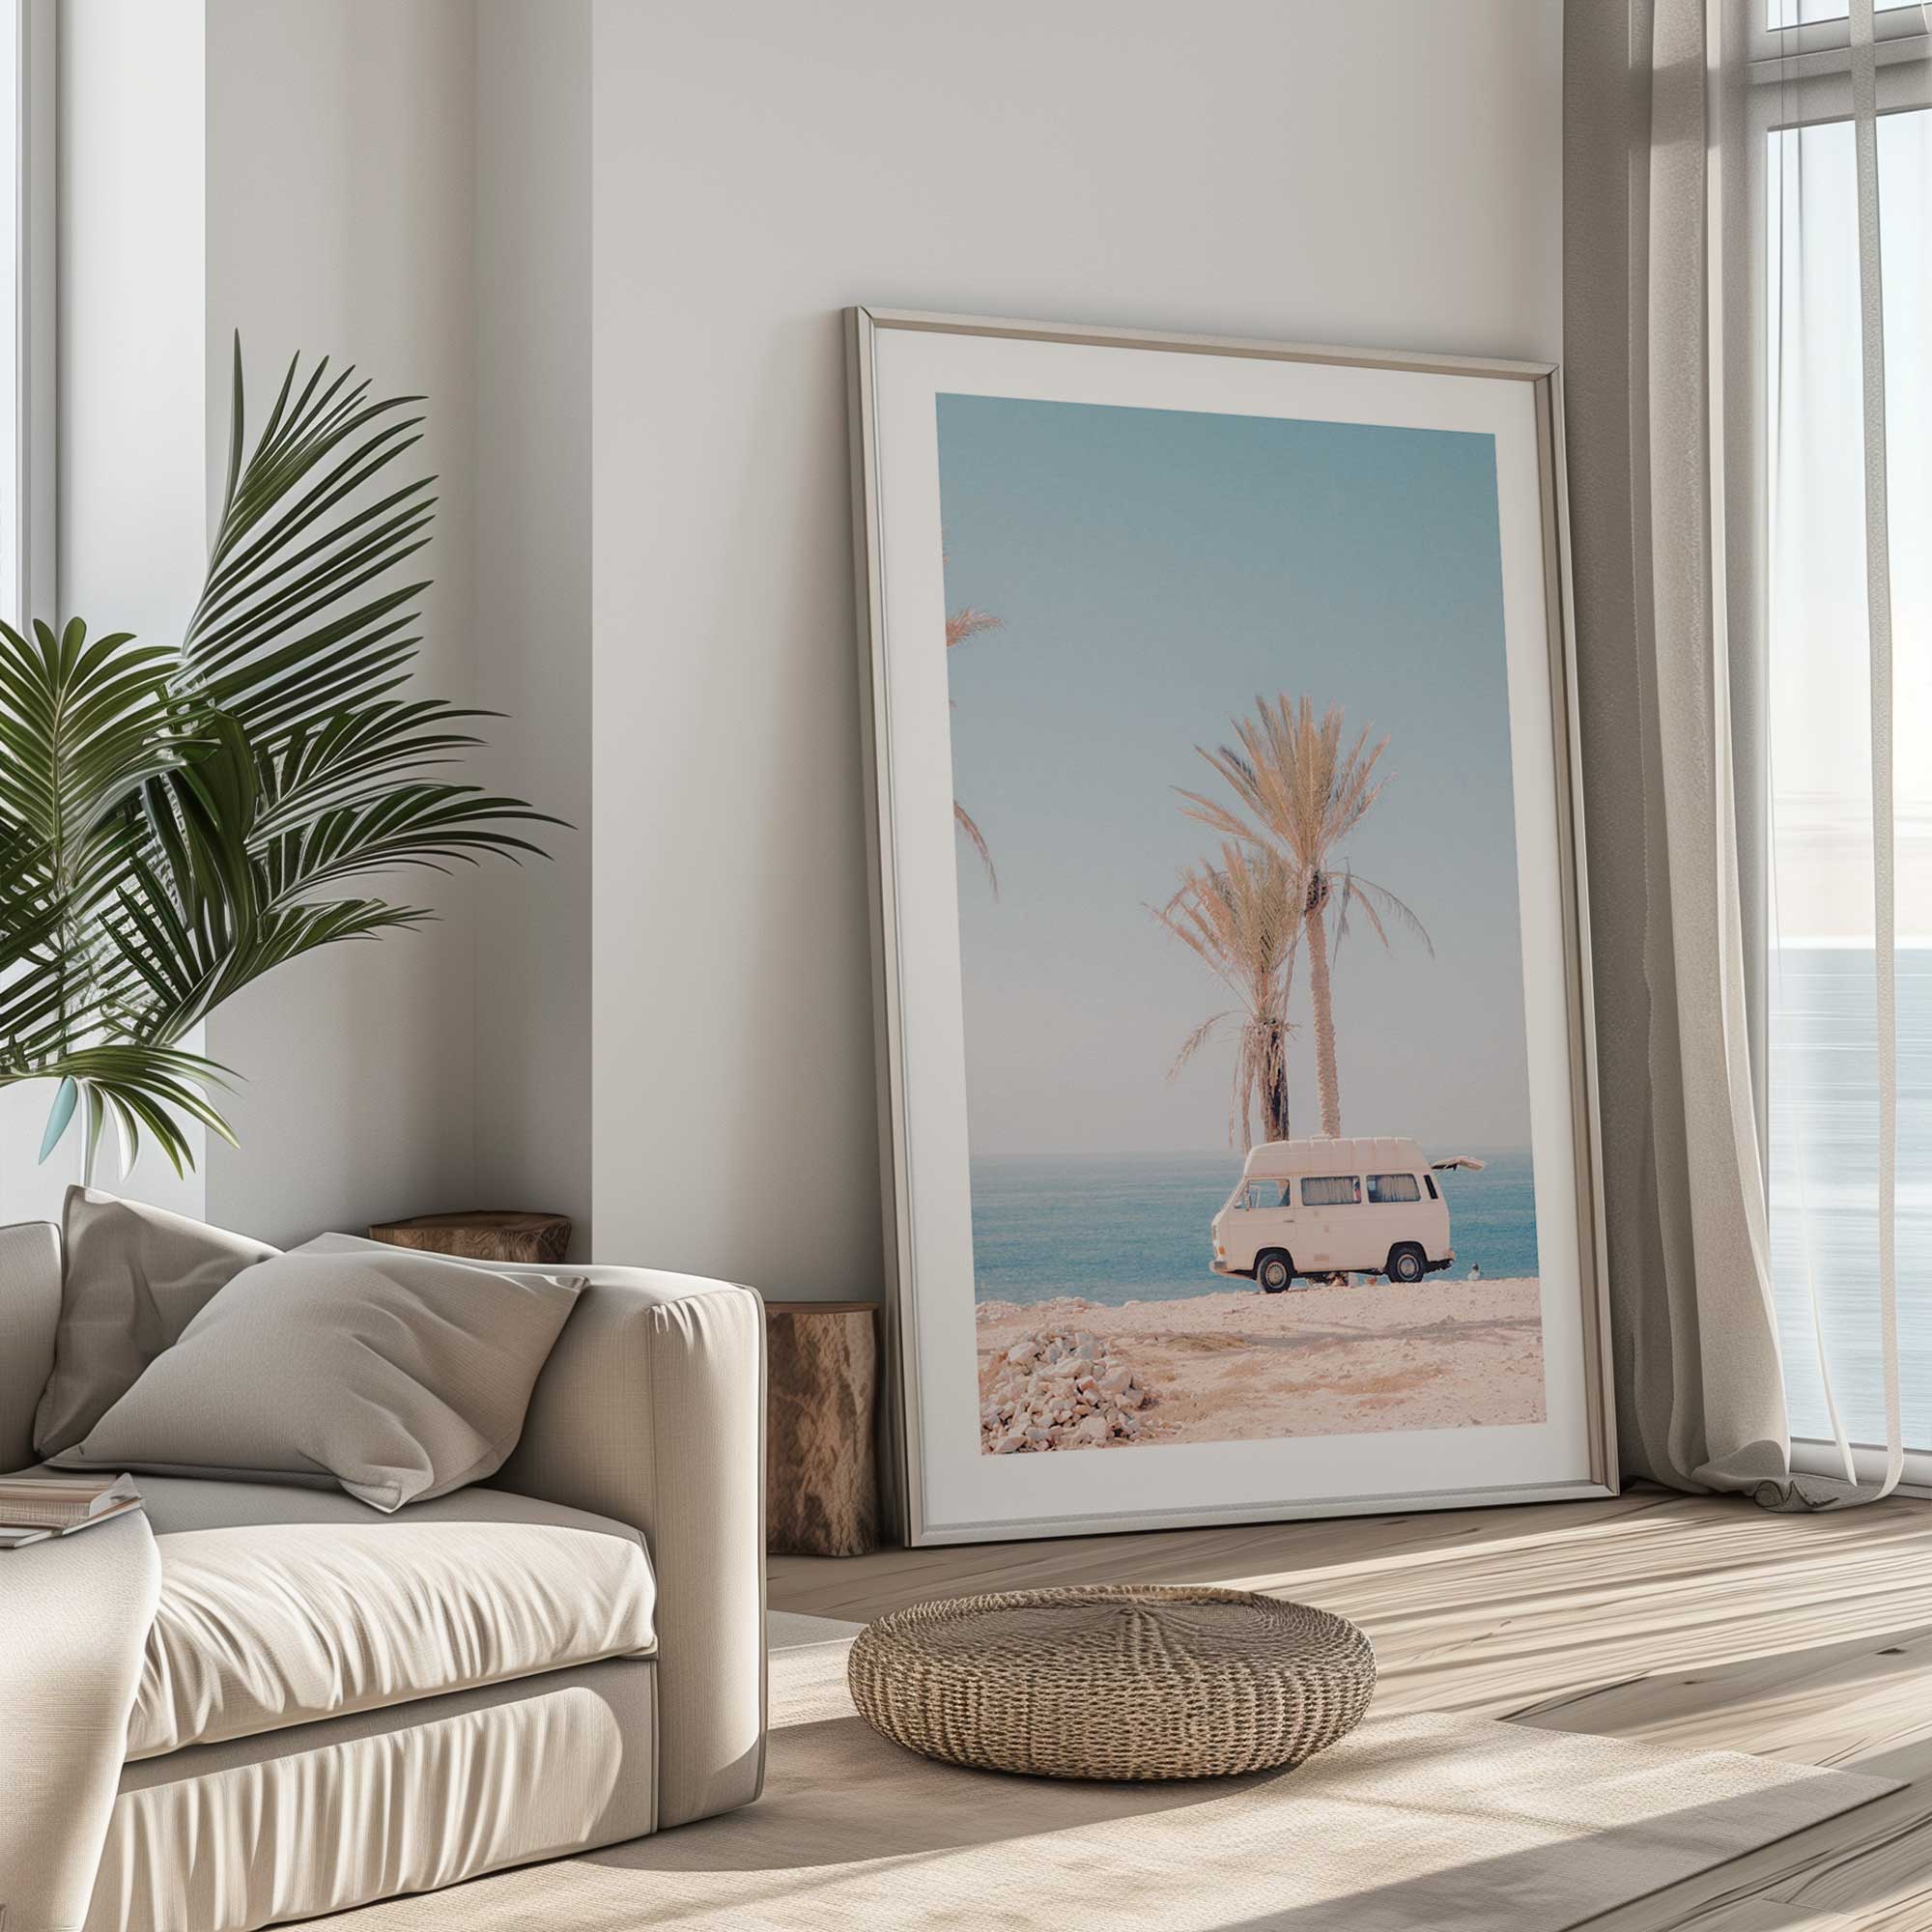
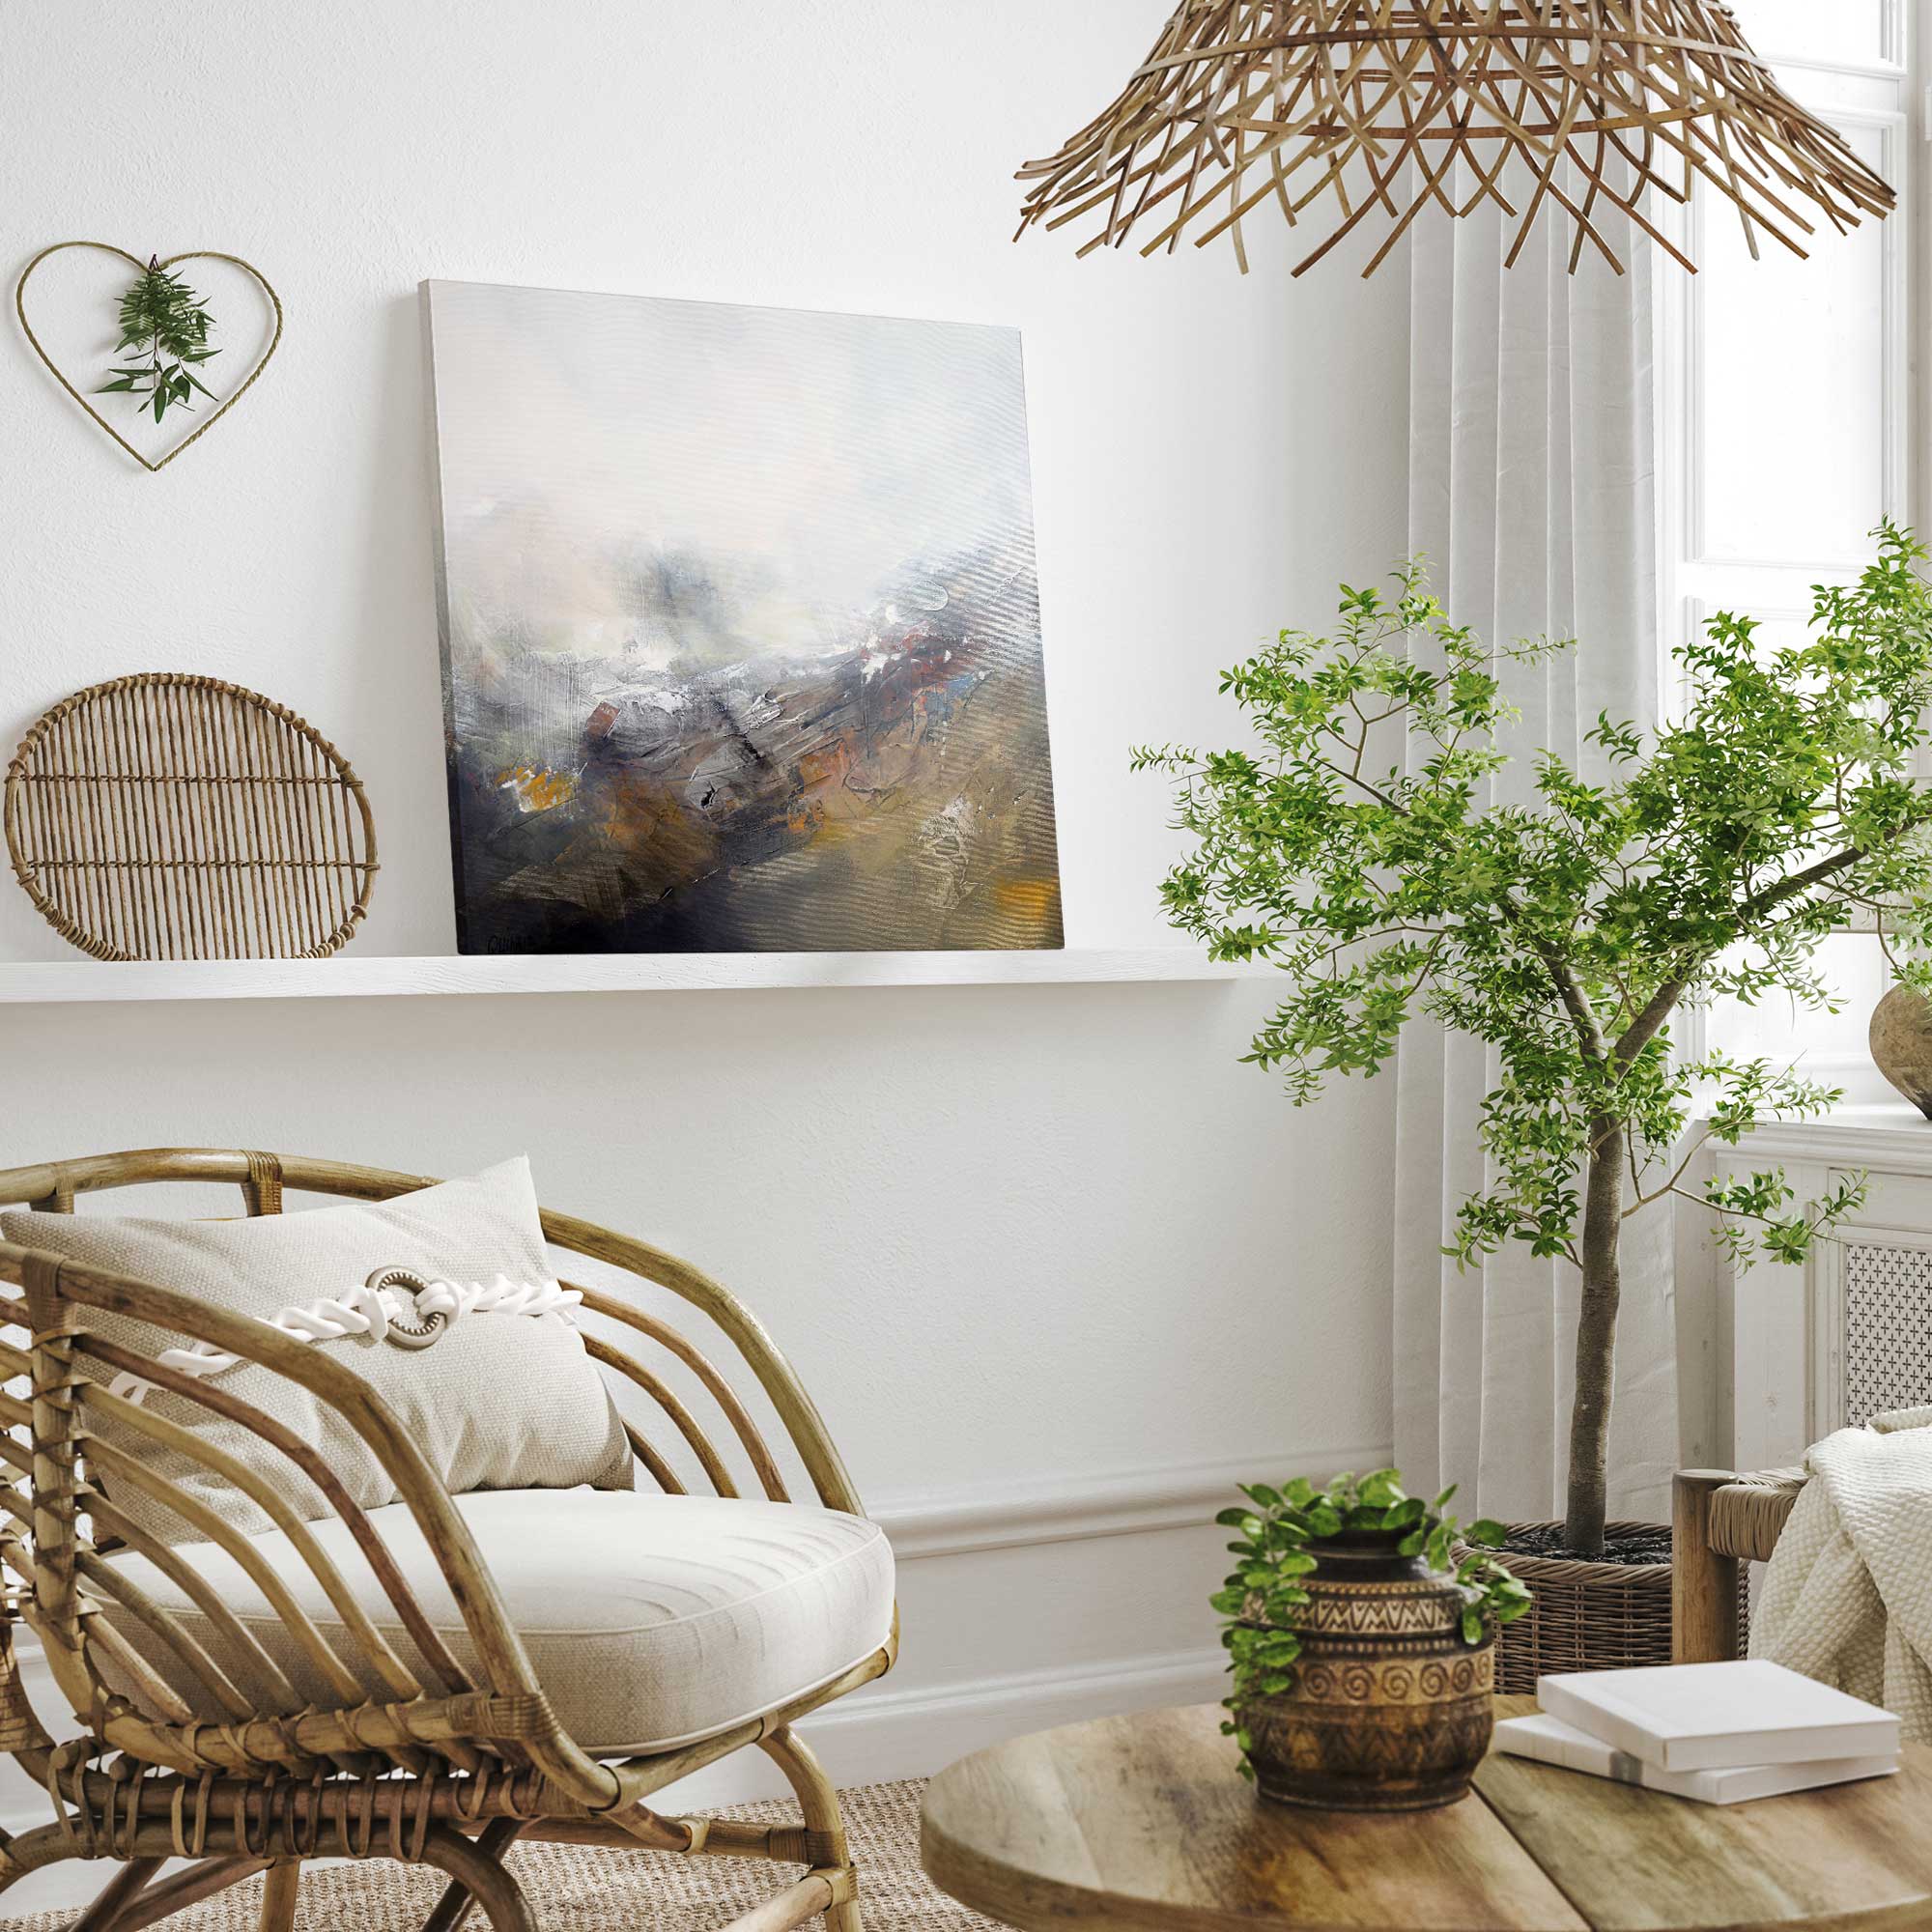
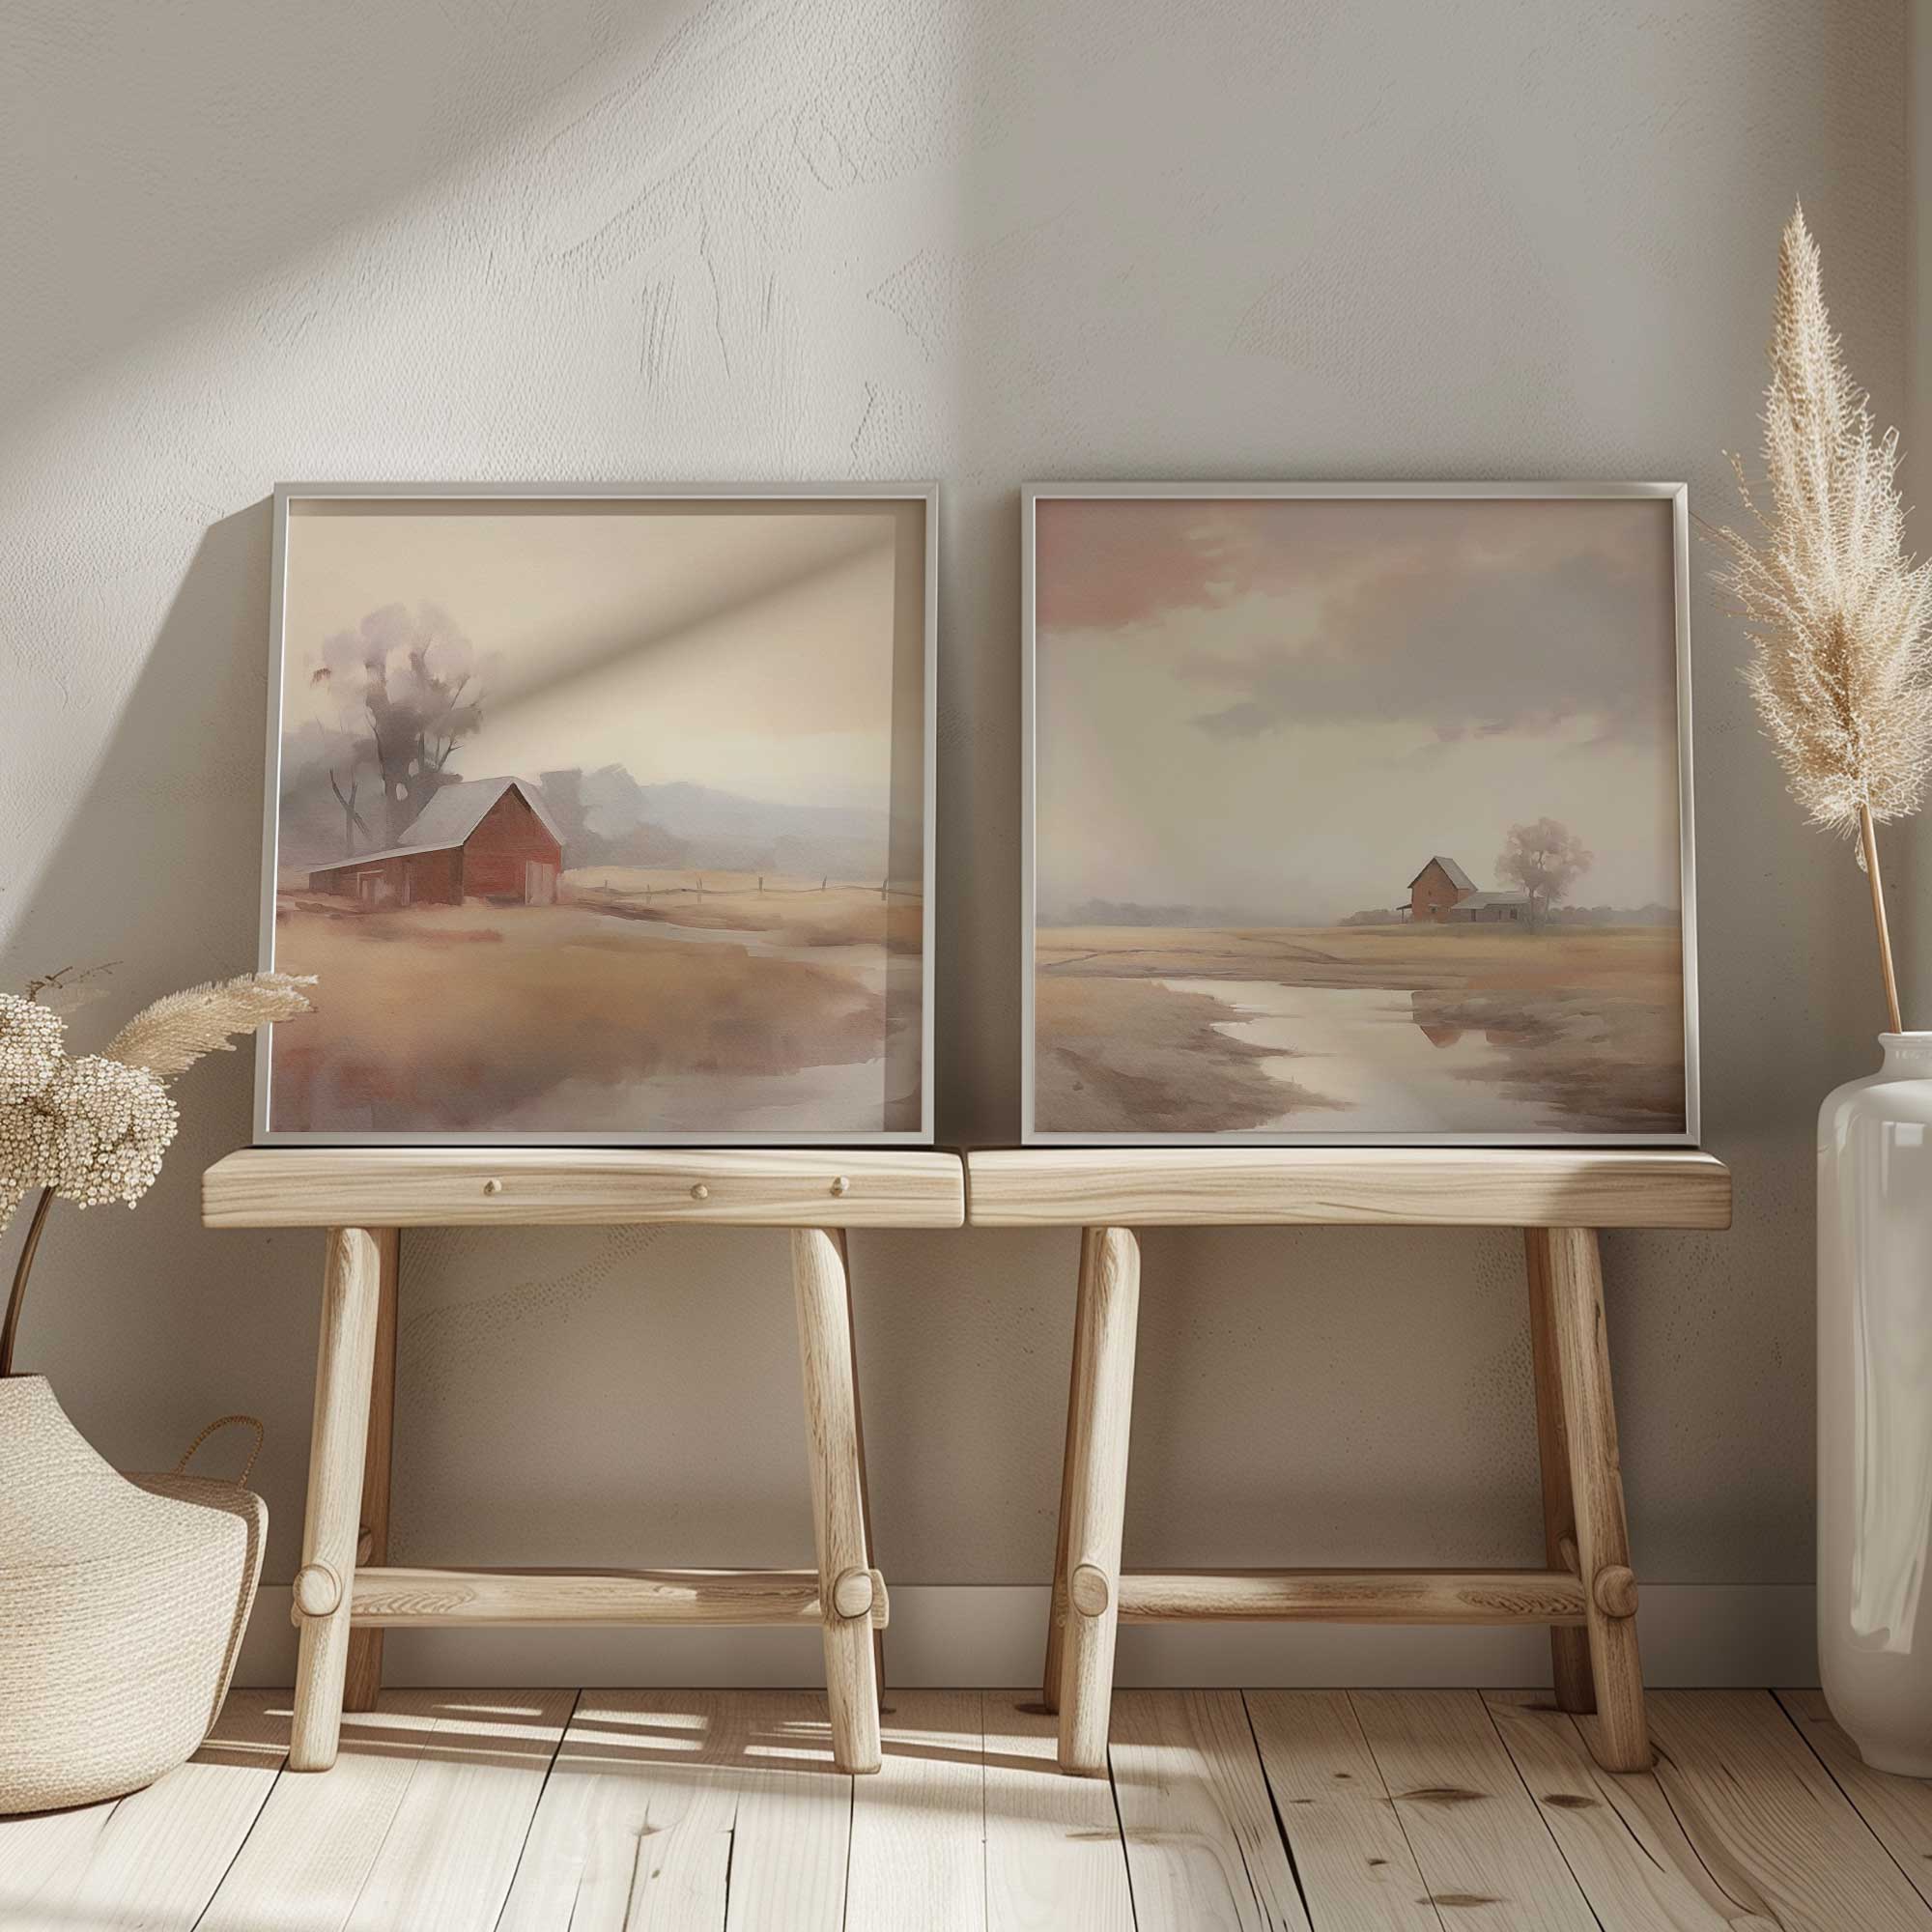
4. Lean Artwork Against the Wall for a Stylish, Hassle-Free Look
For a sophisticated, effortless design approach, consider leaning your artwork instead of hanging it. This technique works particularly well for large frames, statement art pieces, and oversized canvas prints that might be difficult to mount without nails.
Best Ways to Lean Artwork:
- On a Shelf or Mantel: If you have a floating shelf, console table, or fireplace mantel, leaning framed art against the wall creates a relaxed yet curated look.
- On the Floor: For larger artworks (especially over 24 inches), leaning frames against the wall gives a modern, gallery-style aesthetic. This works well in living rooms, bedrooms, and hallways.
- Against Furniture: Place smaller frames on dressers, bookshelves, or nightstands for an elegant layered effect.
Pro Tip: To prevent slipping, place a non-slip pad or rubber bumpers on the back of the frame. This keeps it stable and protects both the wall and furniture surface from scratches.
5. Use a Freestanding Easel or Grid Panel for a Unique Display
If you prefer a movable and versatile display, a freestanding easel or decorative grid panel can be an excellent alternative to traditional wall hanging. This method is ideal for statement pieces, rotating artwork, or even framed photography collections.
- Freestanding Easels: Work best for large framed pieces or artistically styled decor. Create a gallery-inspired look without any wall damage.
- Grid Panels: Lean against the wall and allow you to clip or hang multiple smaller pieces. Perfect for mixing artwork, personal photos, and decorative elements.
Pro Tip: For an elegant touch, opt for a wooden or metal easel that complements your home’s aesthetic. Avoid plastic stands, which can look flimsy and detract from your decor.
Final Thoughts: Choosing the Best No-Nail Hanging Method
The best way to hang wall art without nails depends on the size and weight of your artwork:
- Lightweight prints and small frames: Removable adhesive strips or hook-and-loop strips.
- Medium-weight artwork and standard framed pieces: Adhesive strips with higher weight ratings.
- Large, heavy frames and mirrors: Heavy-duty adhesive hooks.
- Oversized artwork and statement pieces: Leaning against a surface or using an easel.
By choosing the right method, you can personalize your space without damaging the walls—ensuring both a stylish home and a stress-free move-out experiences. If you're looking to re-decorate check out our beautiful art prints and handmade wooden wall frames. Designed for effortless styling and long-lasting elegance, our frames make it easy to create a stunning, rental-friendly gallery wall. Happy Decorating!